A fishing leader is the end portion of a fishing line before an angler hook. Do you know why anglers use a fishing leader on a fishing line?
It helps them to present a lure or bait naturally. In addition, it keeps the fishing line safe from sharp and abrasive surfaces.
In this article, we will walk you through how to tie a leader on a fishing line in step-by-step instructions. Don’t miss this post if you are struggling to tie a fishing leader perfectly.
Why Use A Leader On Fishing Line?
Fishing leaders provide several benefits in fishing. It allows you to present your bait or lure naturally.
A fishing leader on a fishing line keeps the line hidden. The fish struggle to spot the line easily.
When it comes to baitcasting and spinning gear, fishing leaders come in handy.
They keep the fishing line safe from unwanted twisting when using special lures. The fishing gear remains in a straight position.
Many anglers prefer to use metal leaders with a thicker shield to ensure maximum protection against fish with sharp teeth or scales.
Besides, when fishing in freshwater or saltwater, anglers prefer using wire leaders to prevent losing your hook, lure, or fish.
Fishing leaders are mainly made from nylon or fluorocarbon material.
They can secure your fishing gear by providing extra line strength and abrasion protection.
How To Tie A Leader On A Fishing Line?
The main advantage of a fishing leader is that it ensures a better and concealed lure or bait presentation.
You will save money by using a fishing leader on your fishing line because adding an entire spool of fluorocarbon is not necessary. A couple of inches are enough!
But knowing how to tie a leader on a fishing line is the key. Here we will guide you step by step.
Step 01: Choosing The Right Leader Length
A fishing leader can be anywhere from 30cm to 2m in length.
There is no hard and fast rule regarding the ideal leader length. You can choose it as long or short as you prefer.
However, when choosing a particular length fishing leader, consider four important aspects: the water condition, a specific type of lure or bait, the type of fishing line, and the fish.
For example, longer fishing leaders are necessary if you are fishing on low, clear water, especially for trout. This type of fish is a bit line-shy.
On the other hand, sinking fishing lines requires relatively shorter fishing leaders than others.
It allows you to sink the fly more swiftly and stay bottom in the water column for an extended period.
But floating fishing lines require a fishing leader with a mid-range length.
The length of a fishing leader will vary depending on their bait or lure. The following table shows the different type of baits or lures and their ideal size.
| Type of Bait or lure | Ideal Length (Inches) | Ideal Length (CM) |
|---|---|---|
| Artificial Lures | 24 inches | 61 cm |
| Live Baits | 30 to 48 inches | 76 to 122 cm |
| Drag fray | 16 to 20 inches | 41 to 51 cm |
Step 02: Tying An Overhand Knot With The Leader Line
After choosing the right length fishing leader, tie an overhand knot with your leader line. But avoid tightening it.
It is mainly a fast and simple method of creating a fixed loop at the end of the fishing line.
After forming a loop and put the functional end of the leader line into the loop using your finger.
The diameter of the loop should be large enough to let the last portion of the mainline move in and out smoothly without any disruption.
If you are fishing into dirtier water conditions, make sure to choose heavier leader lines to withstand the excessive weight without breaking the mainline during casting.
Step 03: Adding The Mainline Into The Overhand Knot
The next task is adding a small portion of the fishing line into the overhead knot.
It will create a connection between the fishing leader and the fishing line and form a loop. This will prevent impairing the action of the lure.
After creating a loop close to the overhead knot, use your short, thick finger and index finger to hold the loop.
Then, locate the last portion of your fishing line where it has a loose section.
Wrap around the mainline over the fishing leader five to six times. You can do it for extra one or two times for better protection.
But it will depend on how rigid and how much slippage you think you will have. Keeping the wraps uniform ensures they compress down on the knot perfectly.
Finally, insert the last portion of your fishing line into the loop.
Step 04: Securing The Connection
At this point, your next job is pulling on the fishing line from the back of the overhand knot to form a protective connection.
Be enough gentle and cautious while doing this task. You want to get rid of the slack and put forward the coils in an orderly way into a perfect location.
Ensuring a proper tightness of the coils requires pulling the loose section of the fishing line.
You should not mind giving it another gentle pull for a bit of extra tightness.
Your fishing line might be too rough. It is a good rule of thumb to use saliva before you pull it tight to avoid burning itself as you cinch it down.
Step 05: Tying A Loop Knot
Sometimes, your fishing approach may severally restrict the movement of your lure or hook. Properly tying up the loop knot is essential to avoid this problem.
Use your leader line to form an overhand knot. It will make a strong and effective knot that won’t slip.
Make sure to maintain 4-5″ of distance from both sides of the leader line.
To rig the lure, you should insert the leader line through it and then pass it through the initial loop created by tying the overhand knot.
Continue pulling on the leader line until the knot makes contact with the upper section of the lure.
Next, take the shorter bottom section of the leader line and coil it around the longer section of the line four to five times.
After coiling the shorter bottom section of the line, pass the remaining part of it through the loop located at the top of the lure and then pull firmly to fasten it securely.
Step 06: Tying A Terminal Knot
Do your fishing leader and fishing line have indistinguishable breaking patterns?
If so, you want to use a terminal knot as they snug or tighten up against the hook eye.
This type of knot is strong and more likely to decrease the action amounts that a lure or bait has in the water.
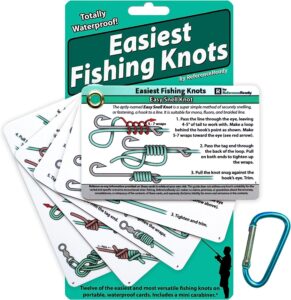
Locate the hook or lure the eye and pass the fishing leader through it. Then rotate the fishing leader from the back side to form a loop.
Put the short last section of the fishing leader into the loop while holding the last section of the fishing leader using your hands. This will help you form another loop
Both loops will have the appearance of an Infinity symbol.
Then, pass the fishing leader through the second loop two times through wrapping. Apply pressure until the loops disappear and the knot is positioned directly on top of the hook.
This kind of knot is known as the Orvis knot. Tying it appears simple. The strong fishing knot works in diameters up to 30 lb.
Step 07: Tying A Uni-Knot
If you are interested in joining two fishing lines together, a Uni-knot comes in handy.
This type of knot is a multi-purpose fishing gear, especially used in braided fishing lines. It works well with fine tippets and small flies, especially in low-light situations.
Uni-knot is well known for its reliability as it has a 90% strength rating. Anglers often use it for bass fishing knots as it tightens it up a few millimeters from the lure.
To tie a Uni-knot, first, pass the line through the eye of the hook or lure and fold it back on itself to create a circular shape.
Create a uni-knot by taking the tag end of the line, wrapping it around the double line six times, and passing it through the resulting loop.
Dampen the line with water or saliva, then apply tension to the main line to secure the knot.
Finally, use the main line to shift the knot downwards towards the eye of the hook or swivel.
Tips For Tying A Fishing Leader On A Fishing Line
- Consider the length and weight of your fishing leader based on the fishing conditions and species you’re targeting
- Use a high-quality leader material that matches the strength and diameter of your fishing line.
- Practice tying knots before you head out to the water. The more you tie, the more confident and efficient you will become.
- Use a reliable knot appropriate for the type of leader and fishing line you use, such as a Uni-knot, blood knot, or double Uni-knot.
Wrapping Up
Correctly tying a fishing leader is crucial to following a particular knot. You want to select the right leader material and knot to improve your chances of landing a fish and prevent losing your catch. It should be reliable enough to bring in the fish. With some practice and attention to detail, you can master tying a leader and enjoy a successful day on the water. Hopefully, you got a clear idea regarding how to tie a leader on a fishing line.

